Activation
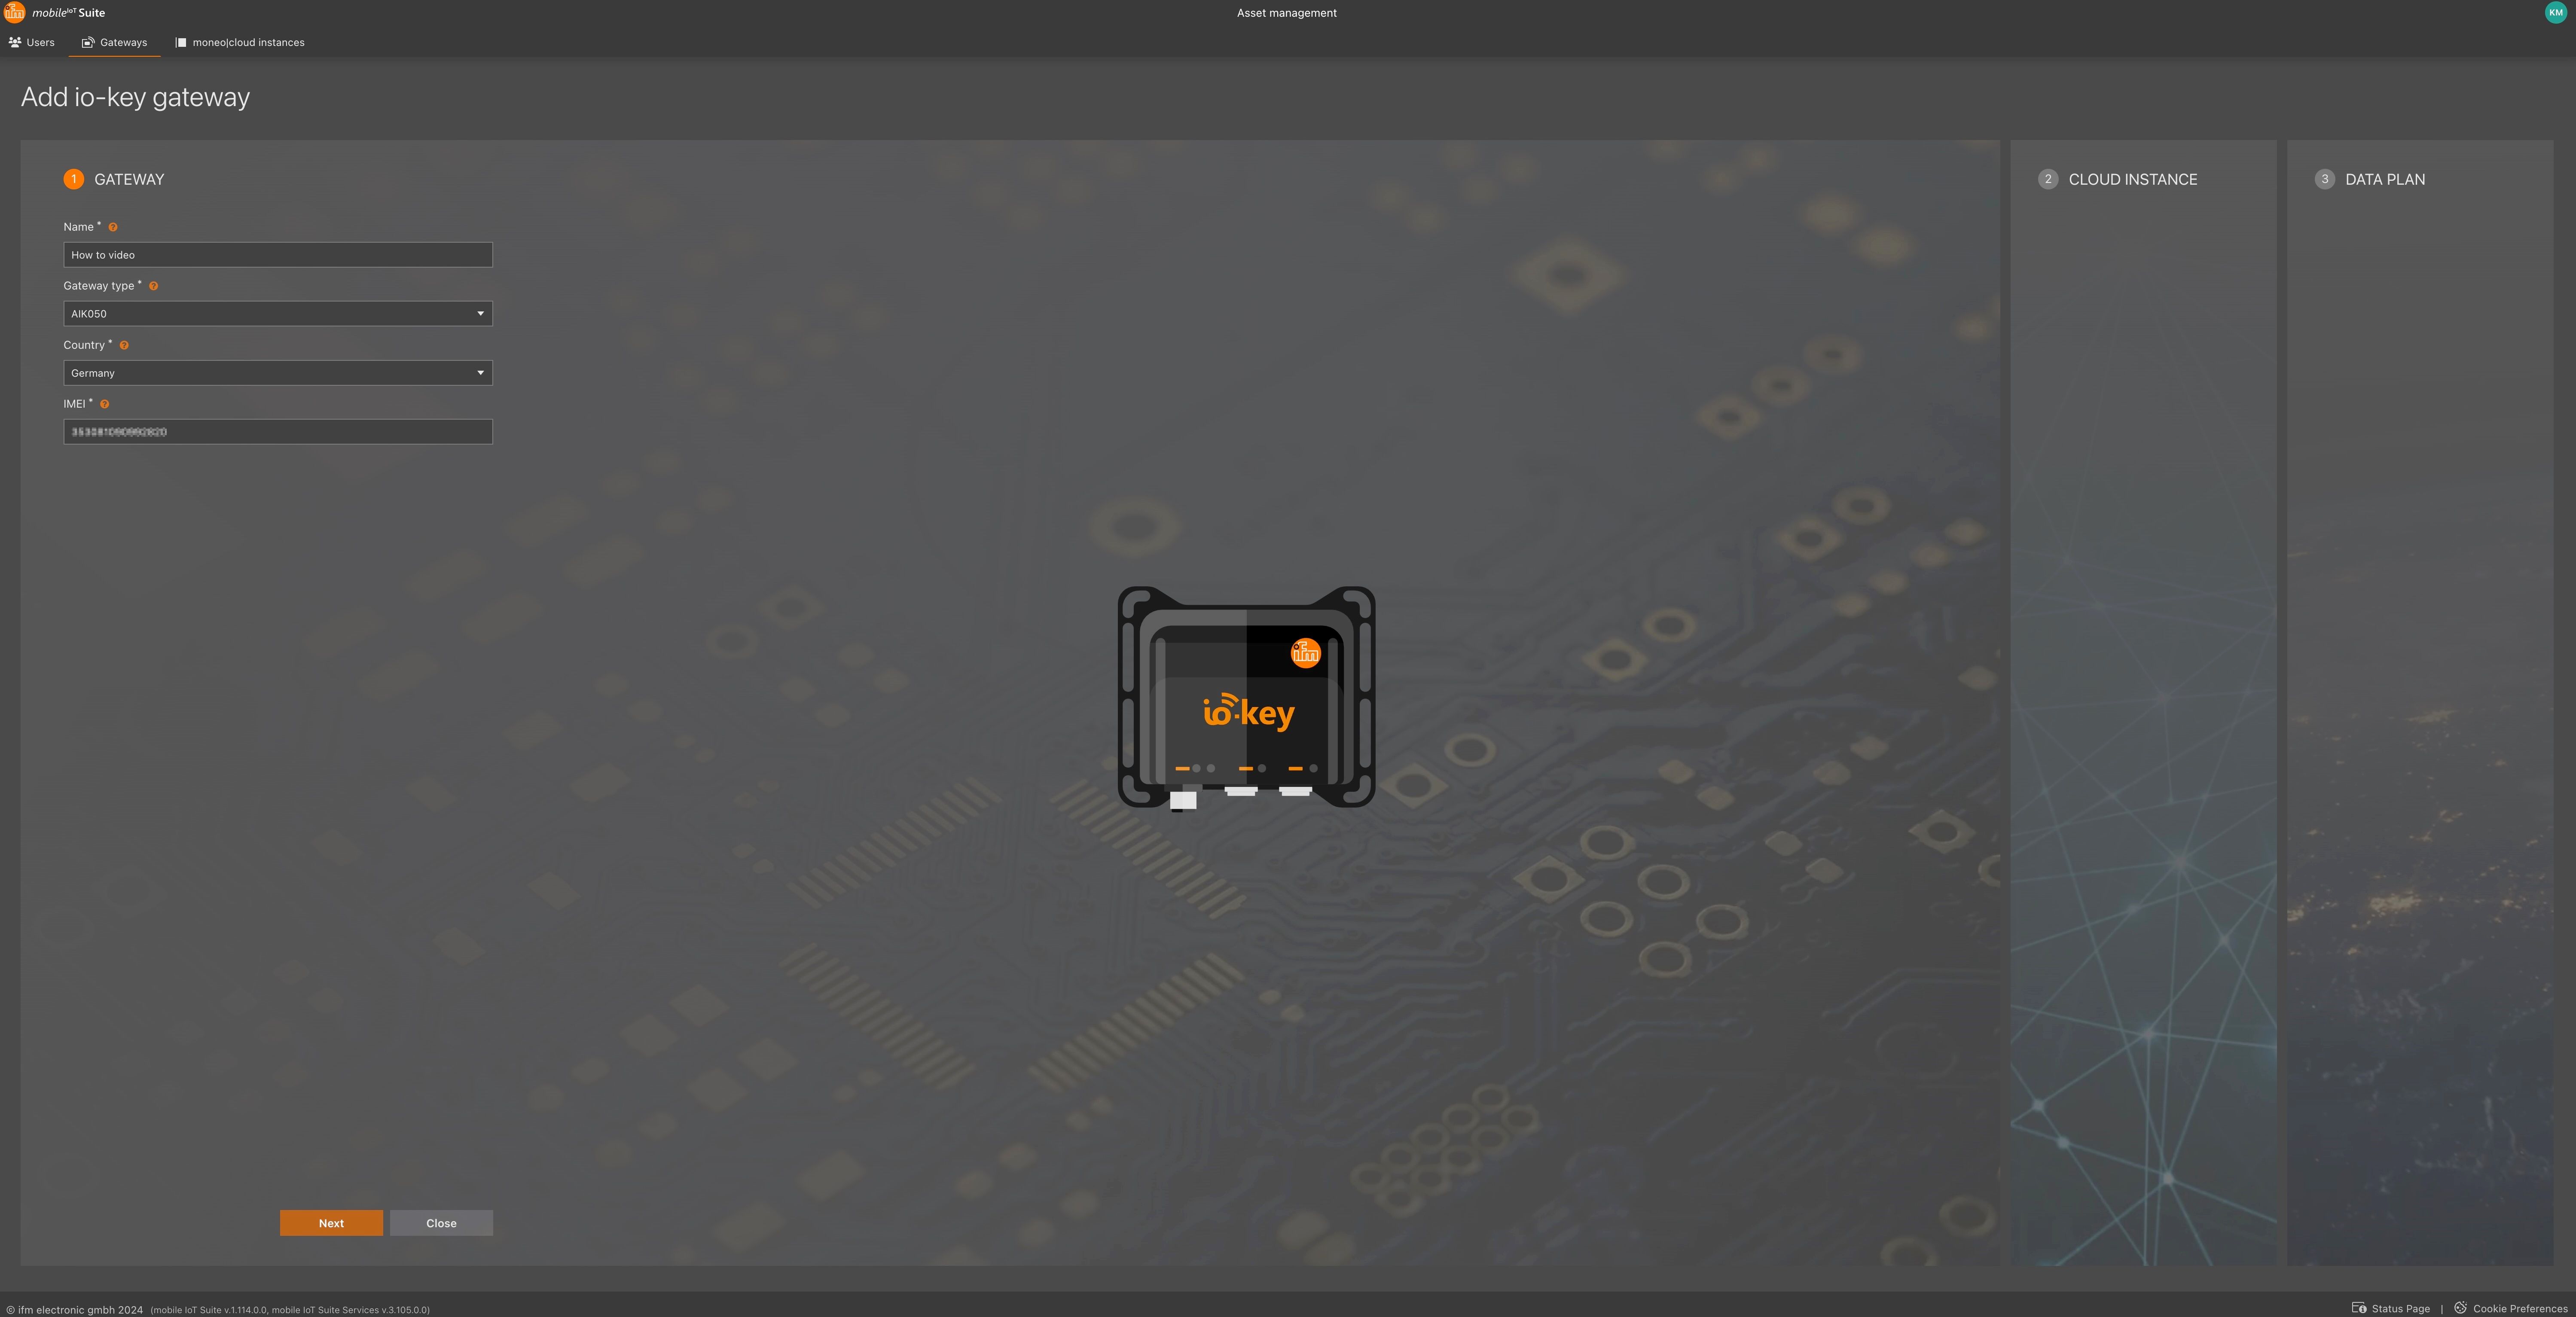
1. Gateway
Enter a unique name to identify the gateway within the platform. This name will not be transferred to other systems and can be changed at any time after activation.
Select the model or article number of the gateway you want to activate. This information can be found on both the front and back of the device.
Specify the country where the gateway will be operated. This information does not affect functionality, even if the location is changed later.
Note: Ensure that the gateway has a valid radio approval for the selected country. This information can be found in the device’s datasheet.
Enter the 15-digit IMEI number of the gateway. This unique identification number is printed on the top and back of the device.
Important: Make sure to enter the IMEI number correctly, as it is mandatory for activation.
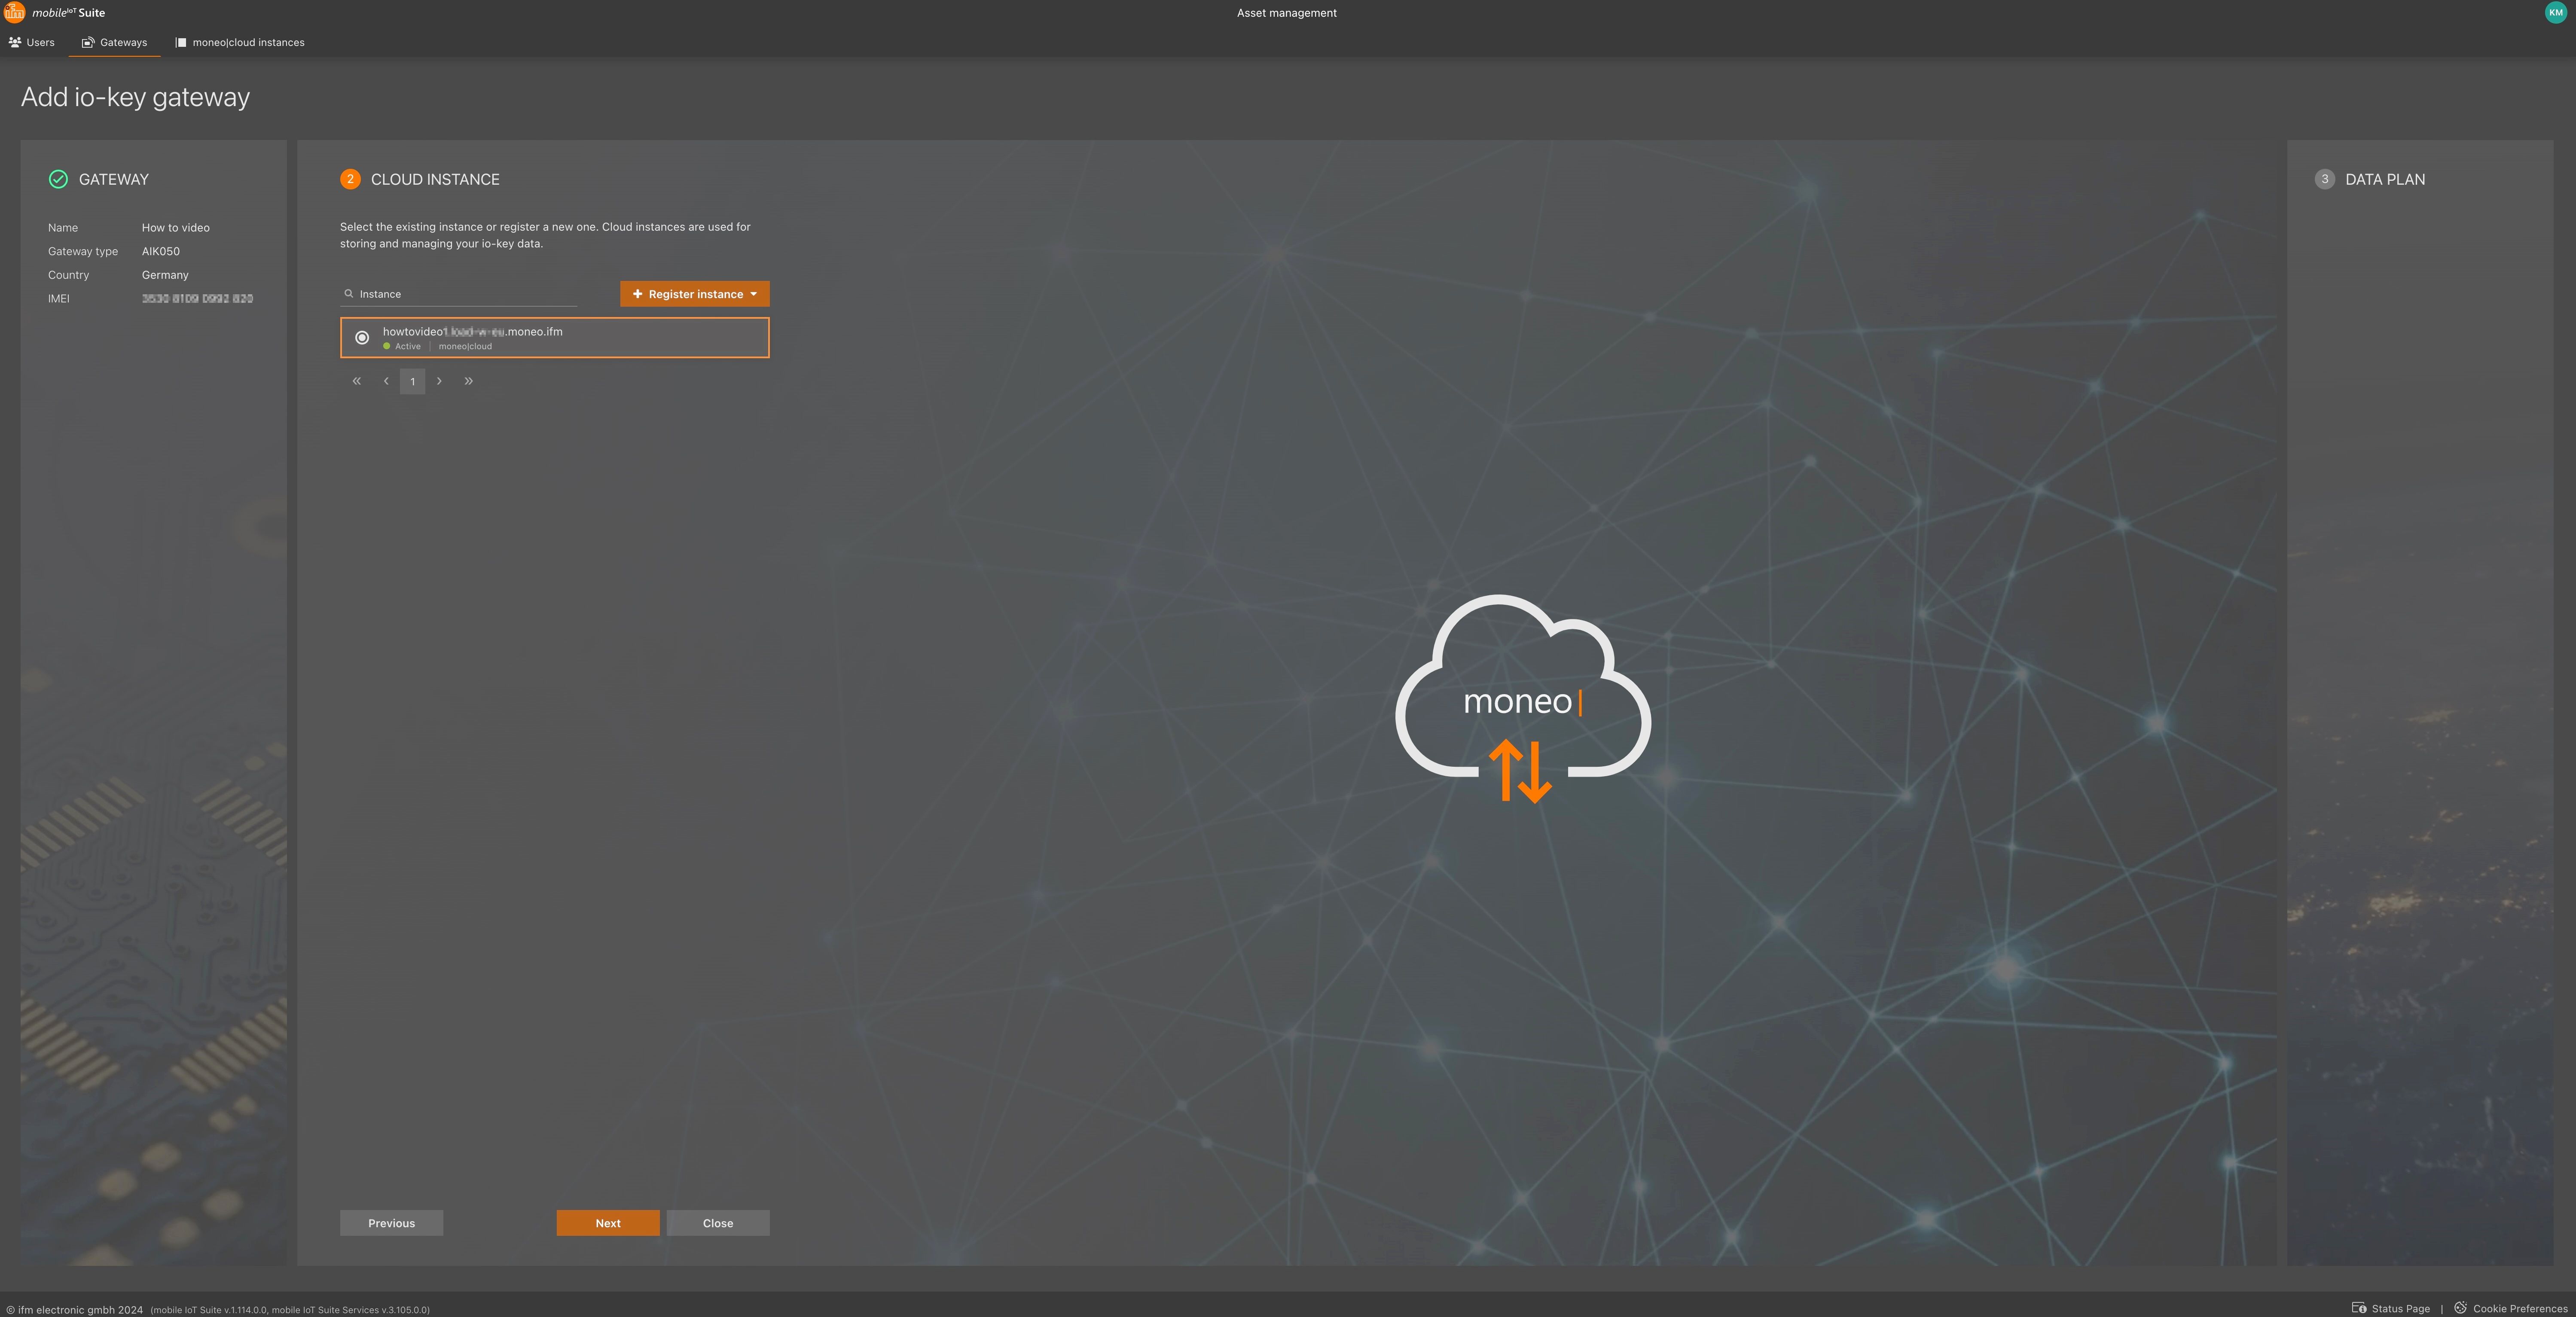
2. Cloud Instance
All Cloud Instances assigned to your customer number will be displayed. Review the list and select the Cloud Instance you want to use.
If no instance is displayed, you may not have created one yet. You can easily create a new instance:
Click the “Add Instance” button and follow the instructions to create a new instance.
Note: A reference to a separate guide for creating a Cloud Instance will be provided here.
Expected Instance missing?
If the desired Cloud Instance is not displayed, please contact our support team for further assistance.
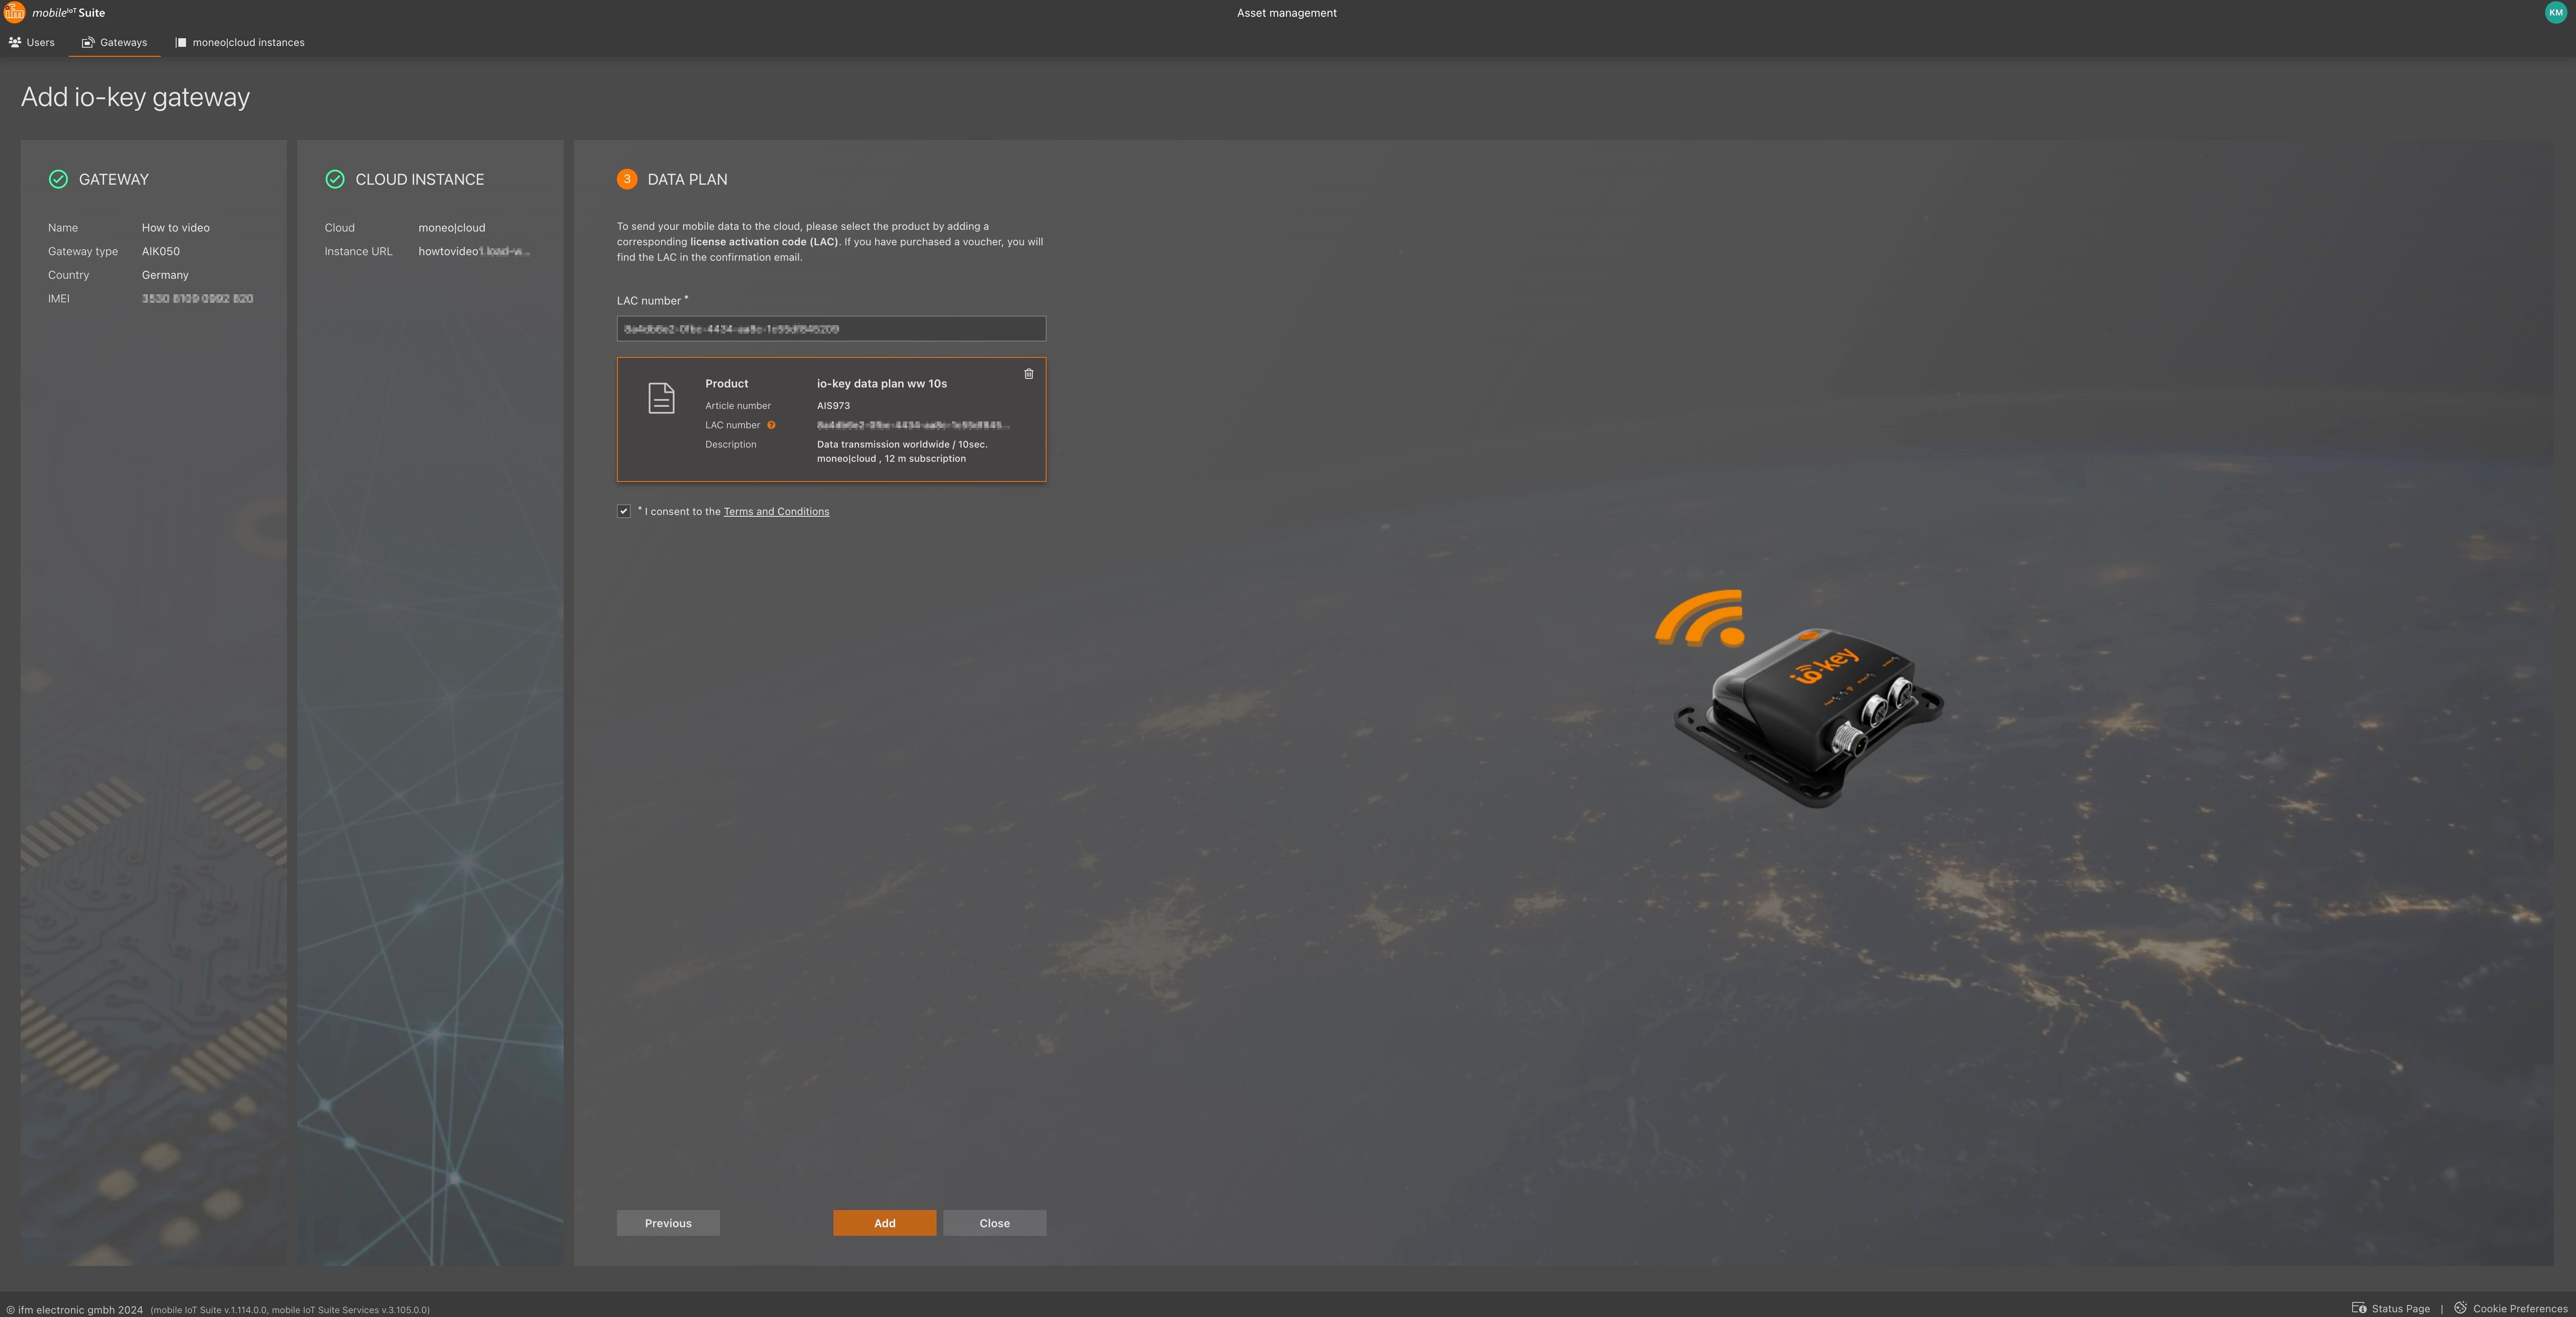
3. Data plan
moneo|cloud
You will see an input field where you need to enter your LAC (License Activation Code). This code is provided via email after your order.
Activate the checkbox “xyz” to verify the LAC input.
⚠️Note: The check will be performed automatically once you select the checkbox.
After successful verification, the product to be activated will be displayed. Check that the displayed information is correct.
Click the “Add” button to start the activation. Once the process is complete, your gateway will be linked to the data plan and ready for operation.
With this step, the activation of your gateway is complete, and it can now transmit data according to the selected plan.
Cumulocity
Note: Some plans may have country-specific restrictions. Please ensure that the selected plan is available in your country.
In the “Customer Reference” field, enter your own reference number, which will appear on your invoice.
This reference helps you to assign incoming invoices more easily.
Additional services are available for optional activation, such as advanced data analysis or support services.
Select the desired services by clicking on the corresponding options.
After selecting the data plan and any desired optional services, click “Next” to confirm your selection.
With this step, the activation of your gateway is complete, and it can now transmit data according to the selected plan.