This feature can only be used with WLAN , as the wireless interface does not support it for Bluetooth.
With this feature, up to 7 clients can be connected to one server — either all on the same por t or on up to 7 different ports .
Important note:
The server’s total transmission capacity is shared among all connected clients !
Example:
In a 1‑to‑1 connection , the system can transmit and receive approximately 4000 messages per second .
When splitting the connection between 2 clients , the throughput per client drops to below 1500 messages per second , because the server has to switch between them.
With 4 clients , the throughput decreases to well below 700 messages per second , and so on.
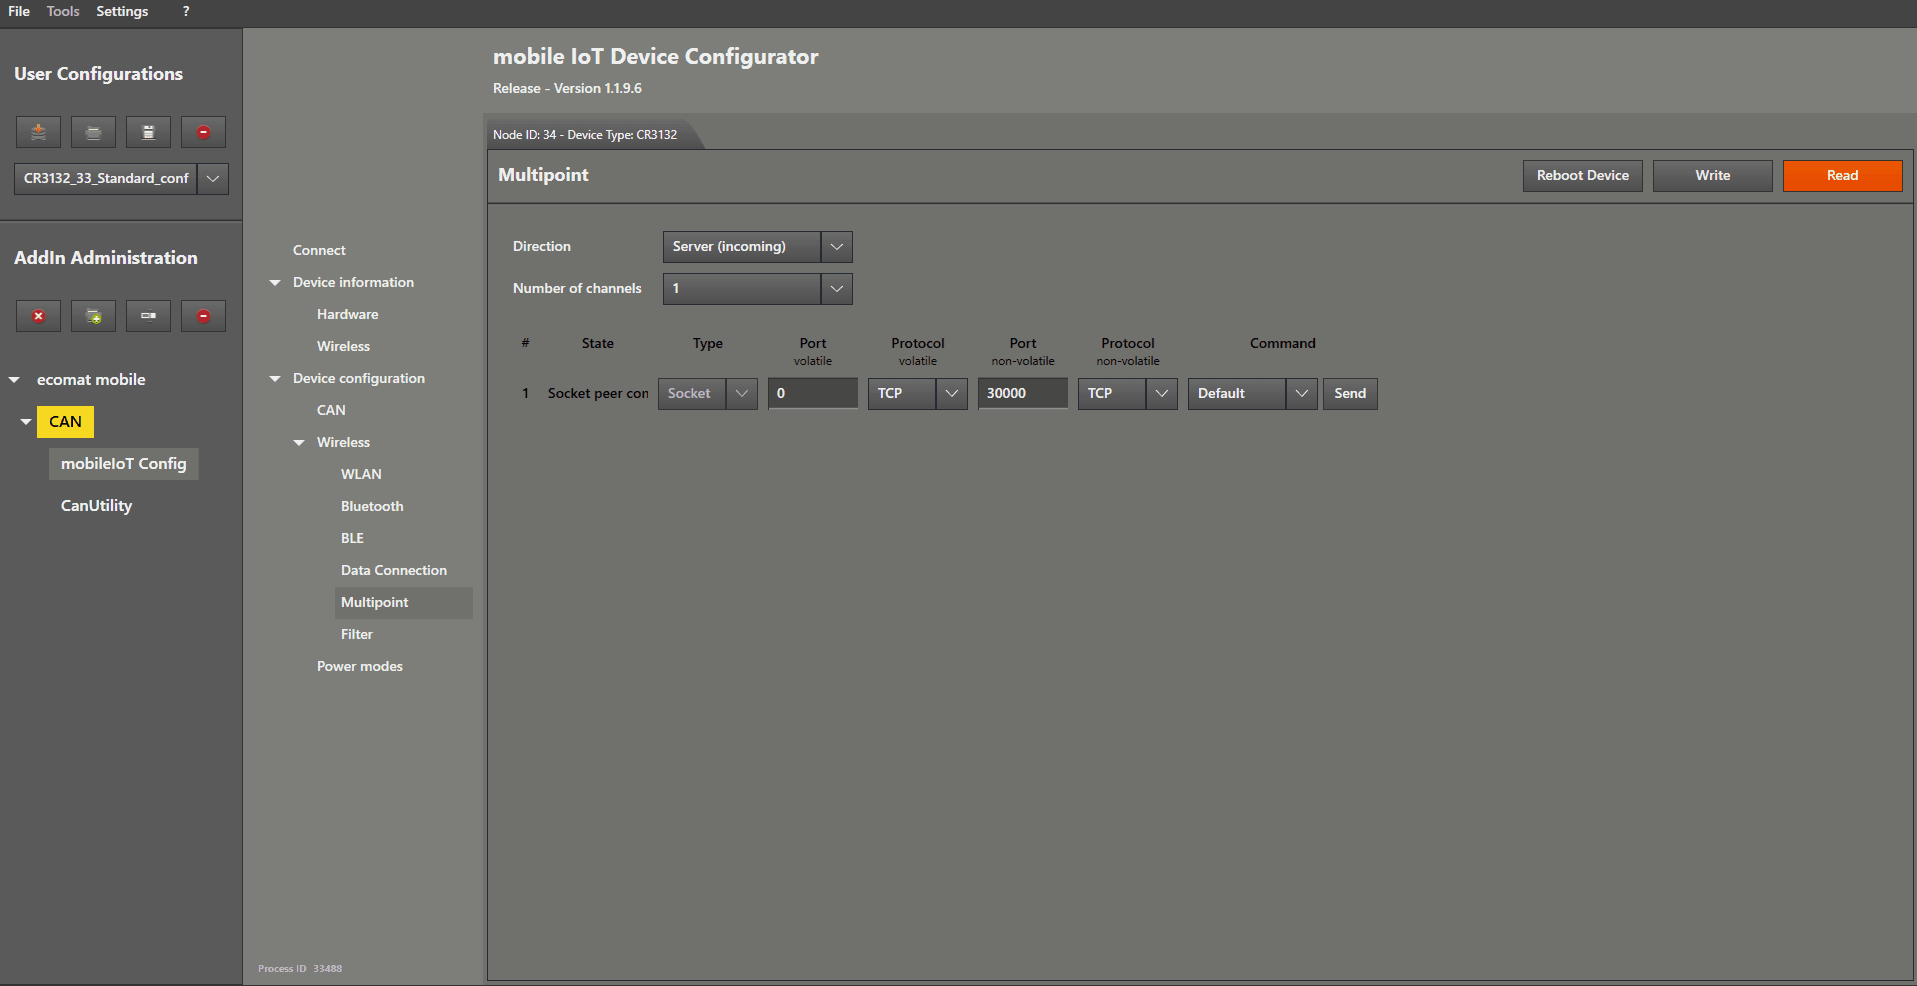
To use this feature, connect to your server device as usual using the MaintenanceTool add‑in .
Follow all steps from the previous server configuration guide until the point where we would switch to “Data Connection” — this is where we continue .
If your server is already fully configured, that's perfectly fine — you can still proceed directly from here.
To enable the multipoint feature, open the “ Multipoint ” menu by left mouse clicking on it.
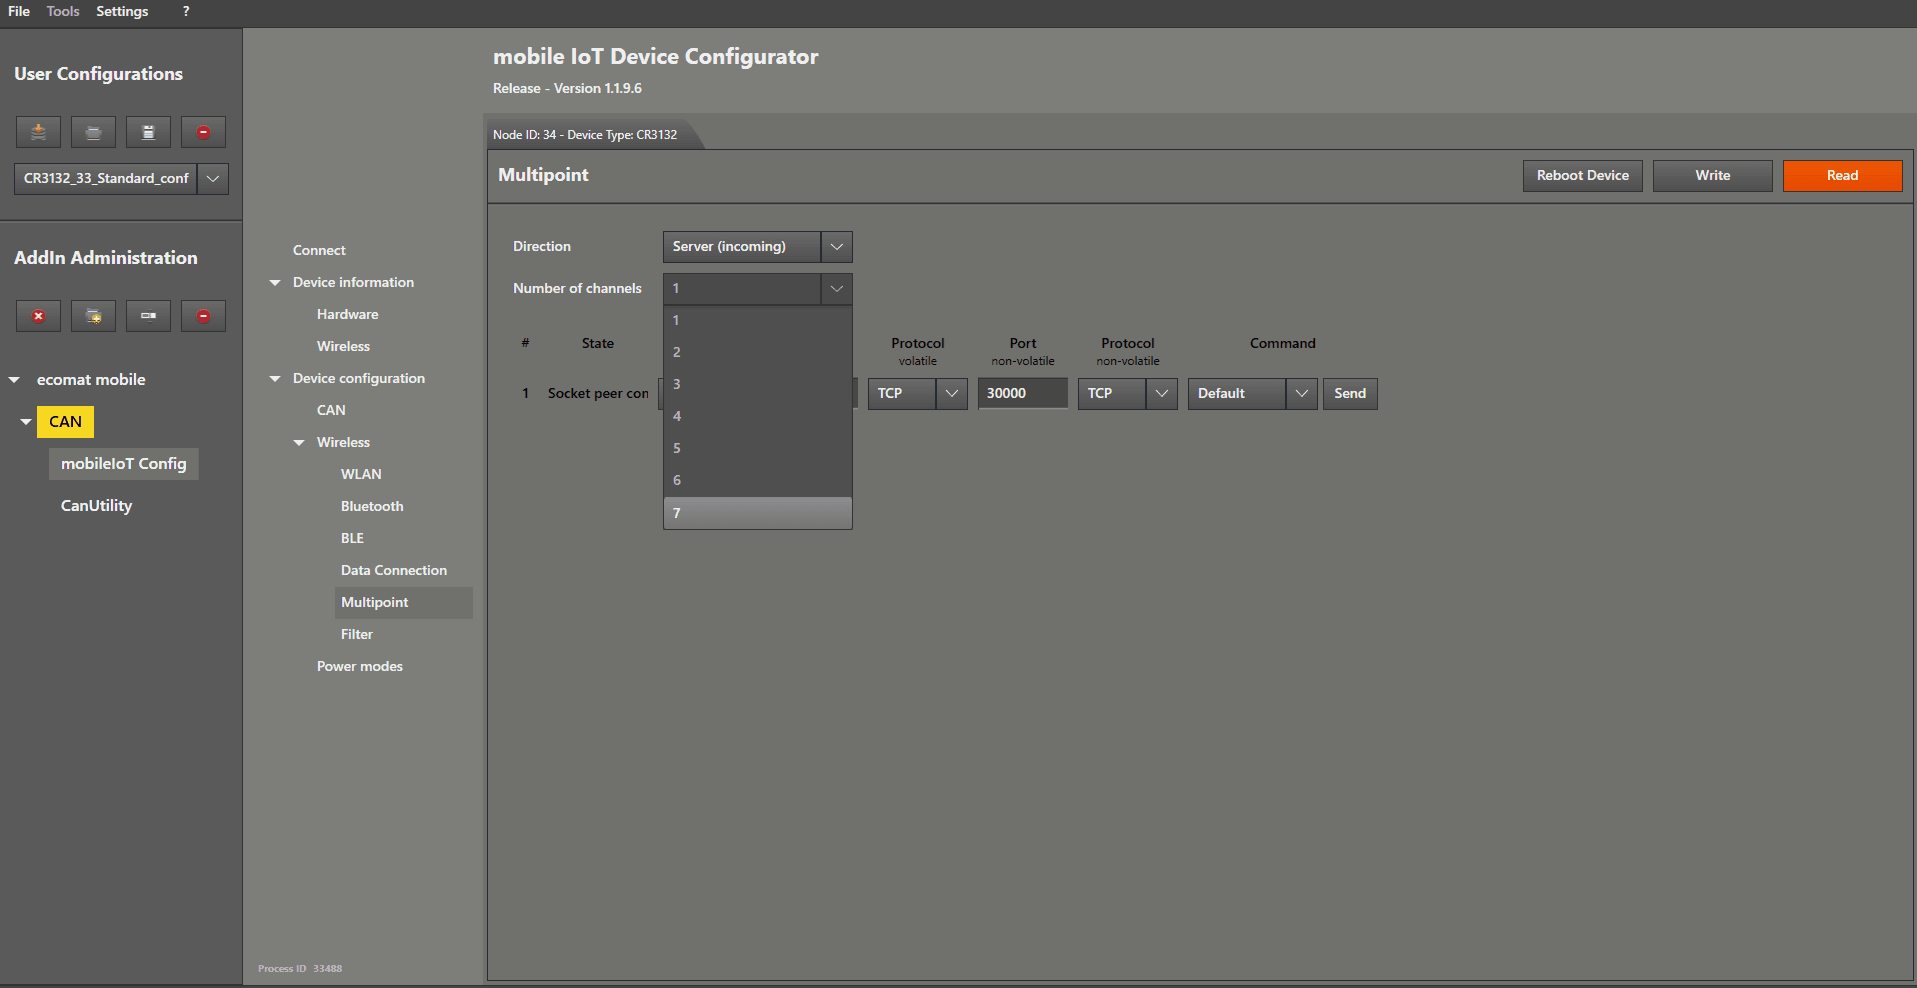
Now you can choose the number of channels you want to use by left mouse clicking on the dropdown menu on the right-hand side of “ Number of channels ”.
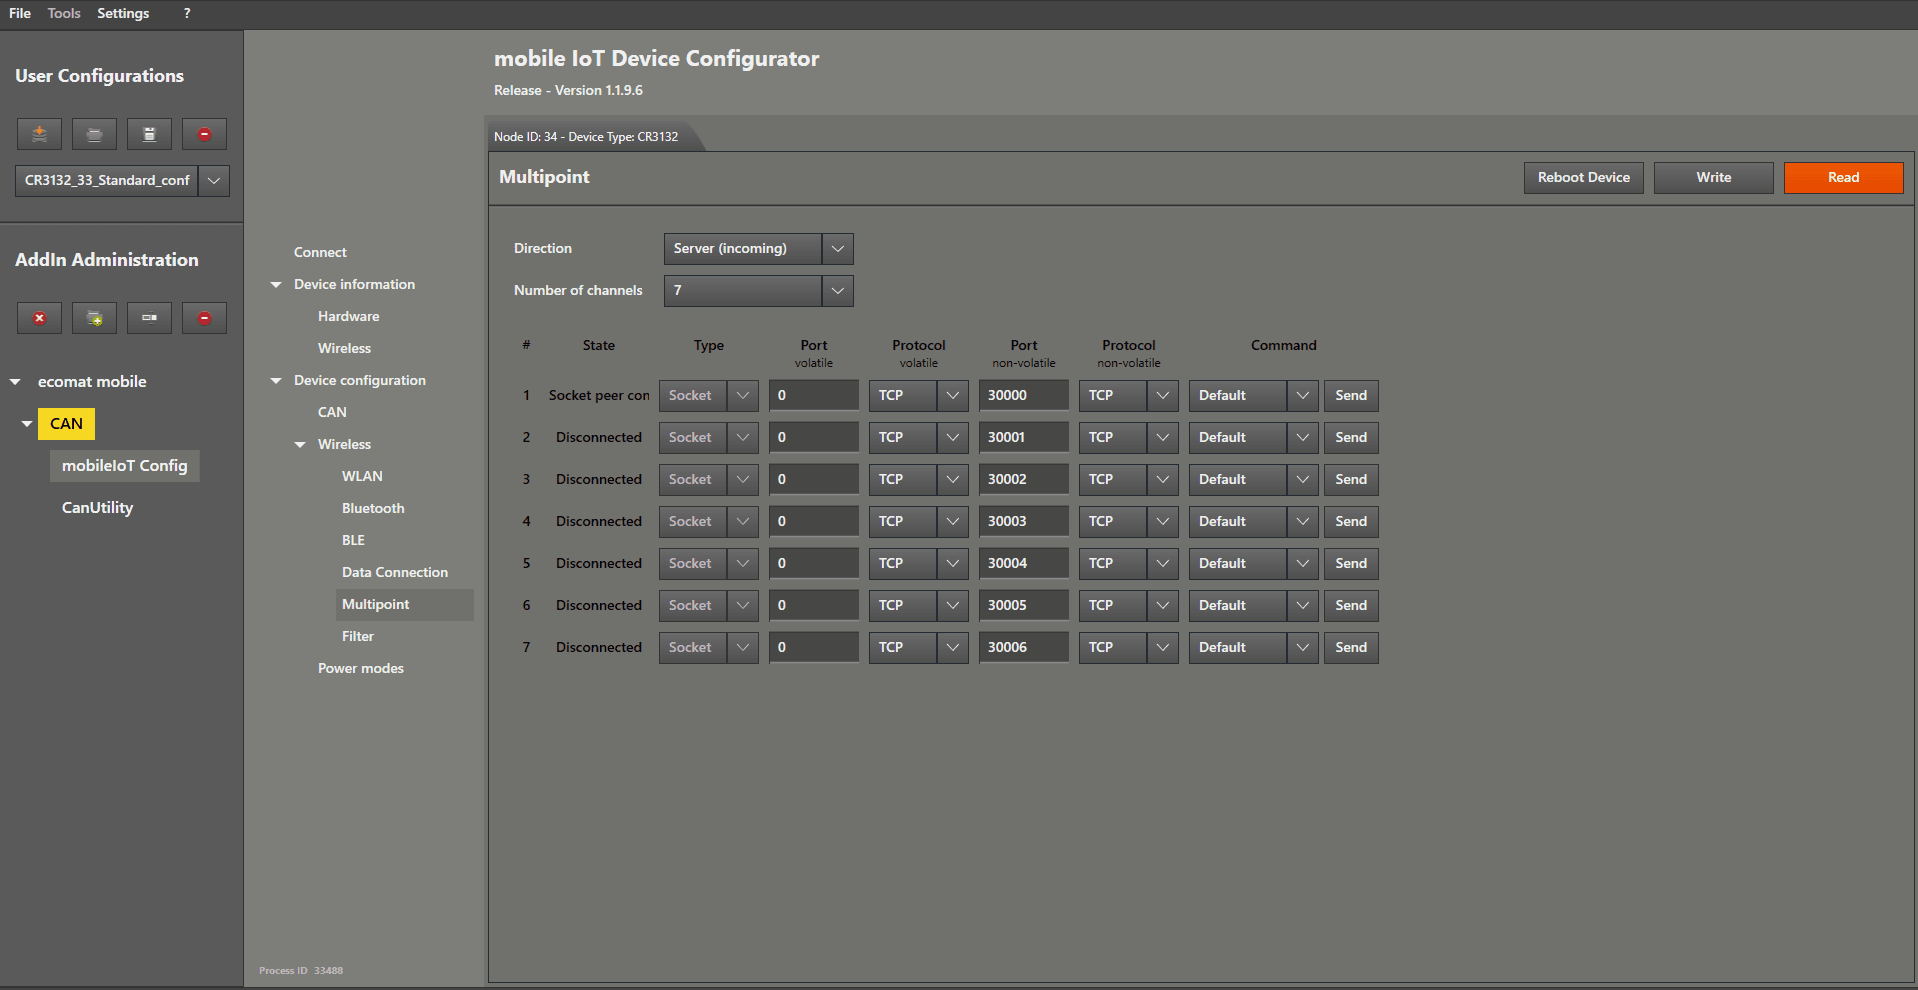
After selecting the number, your window should look like this or similar.
(In the example, the value 7 was selected, therefore 7 channels appear.)
Now we configure the channels.
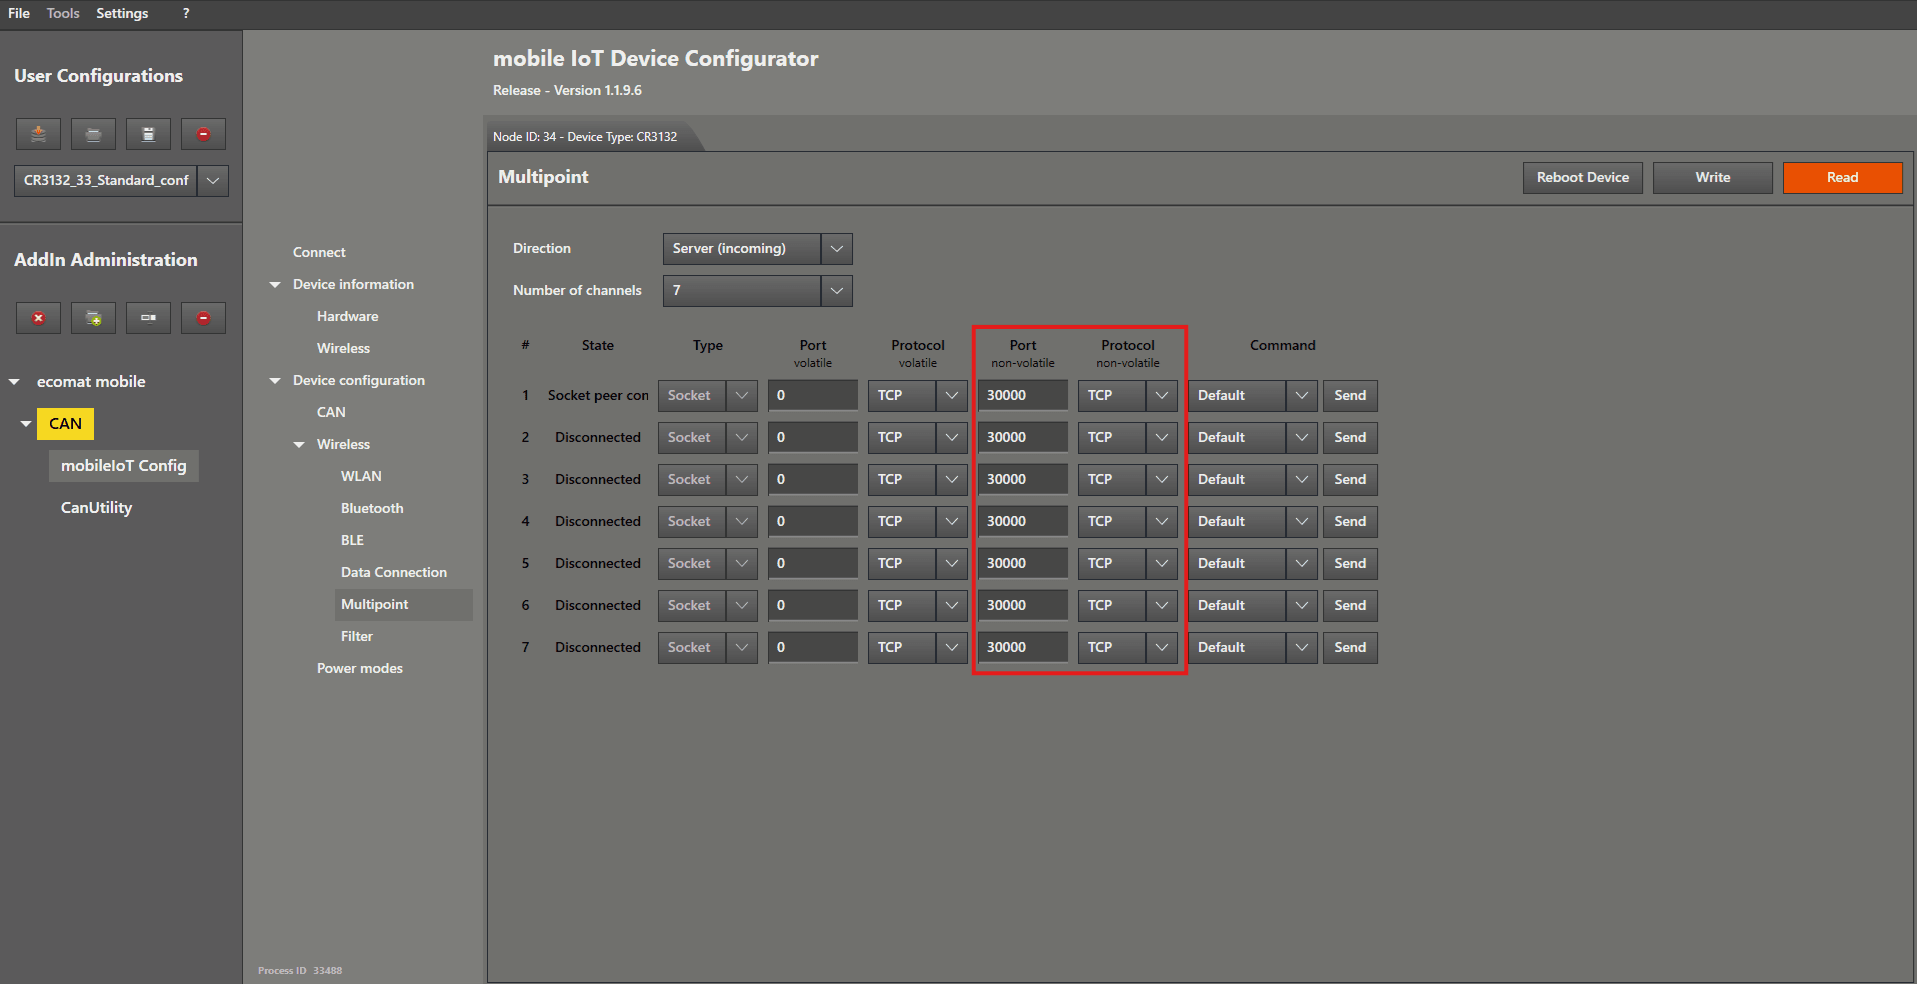
As mentioned briefly at the beginning, you can now select which ports should be used by which channels .
For simplicity, I have selected the same port for all channels.
However, you can use up to 7 different ports — the clients just need to connect to their respective assigned ports!
Then left mouse click the “ Write ” button.
Now you can continue setting up your clients.
If you need help, return to the “ WLAN CAN Bridge Mode ” guide and proceed to the client configuration section.